|
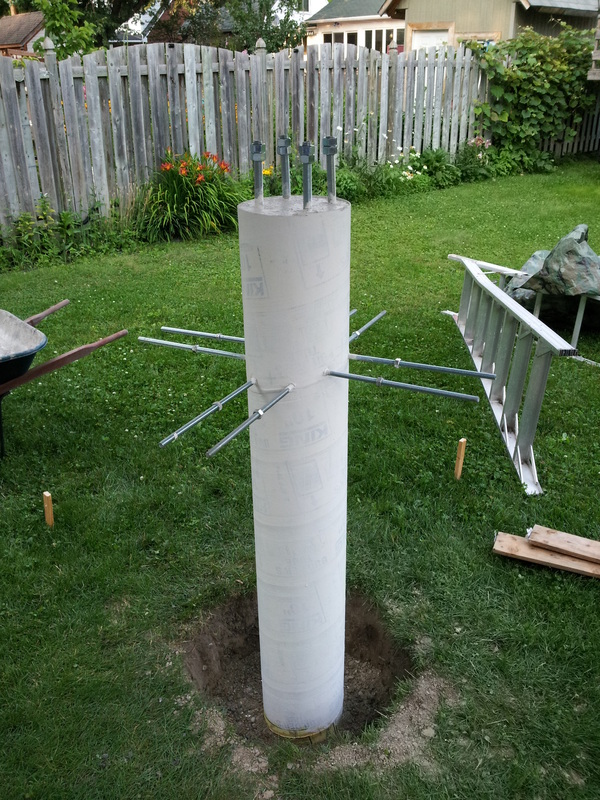
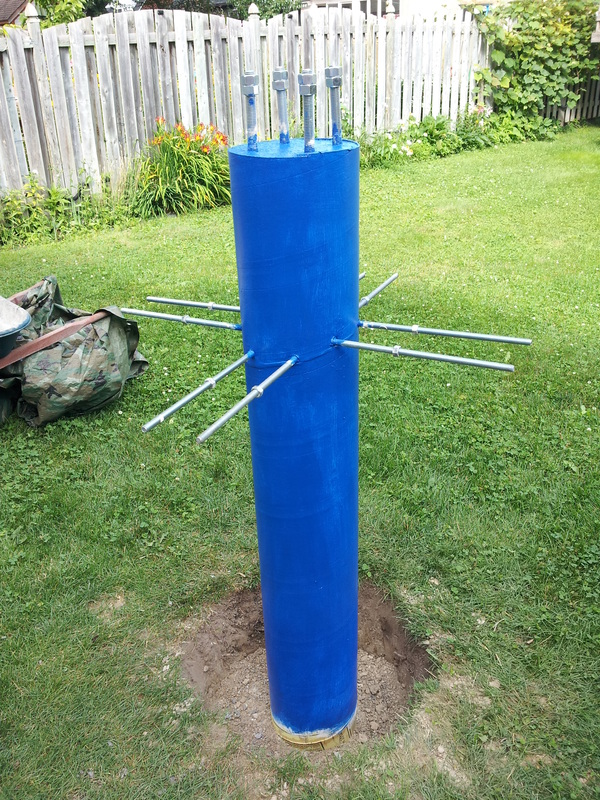
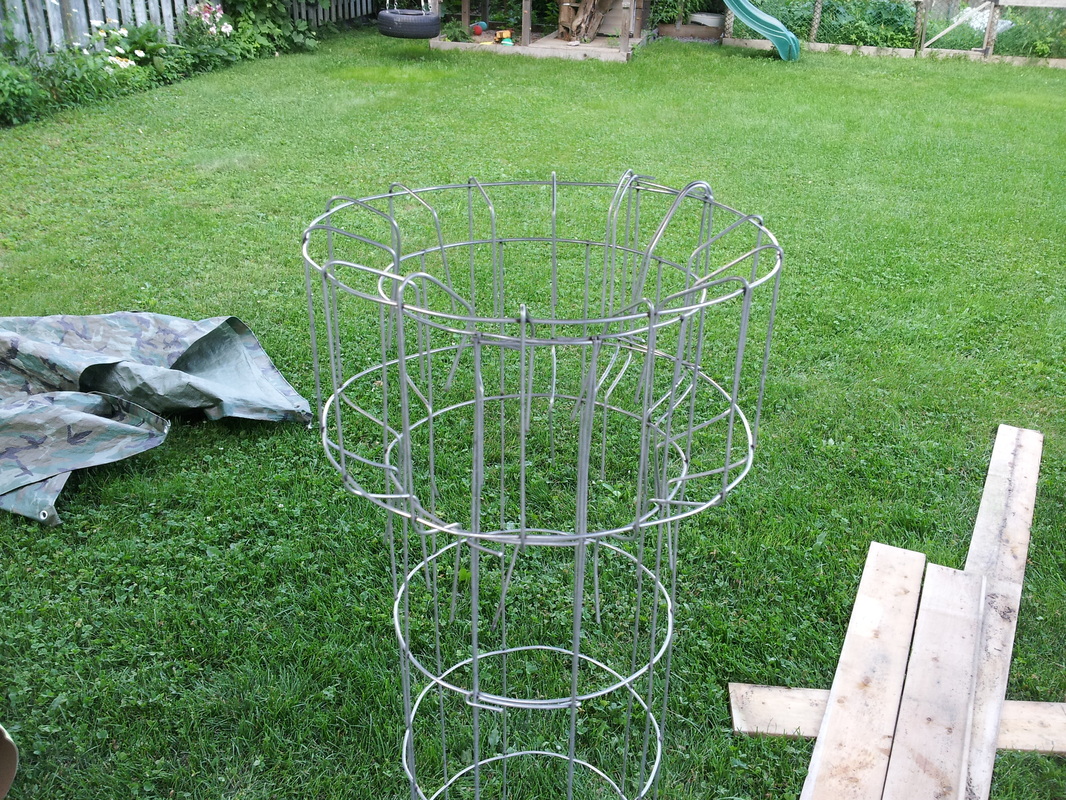
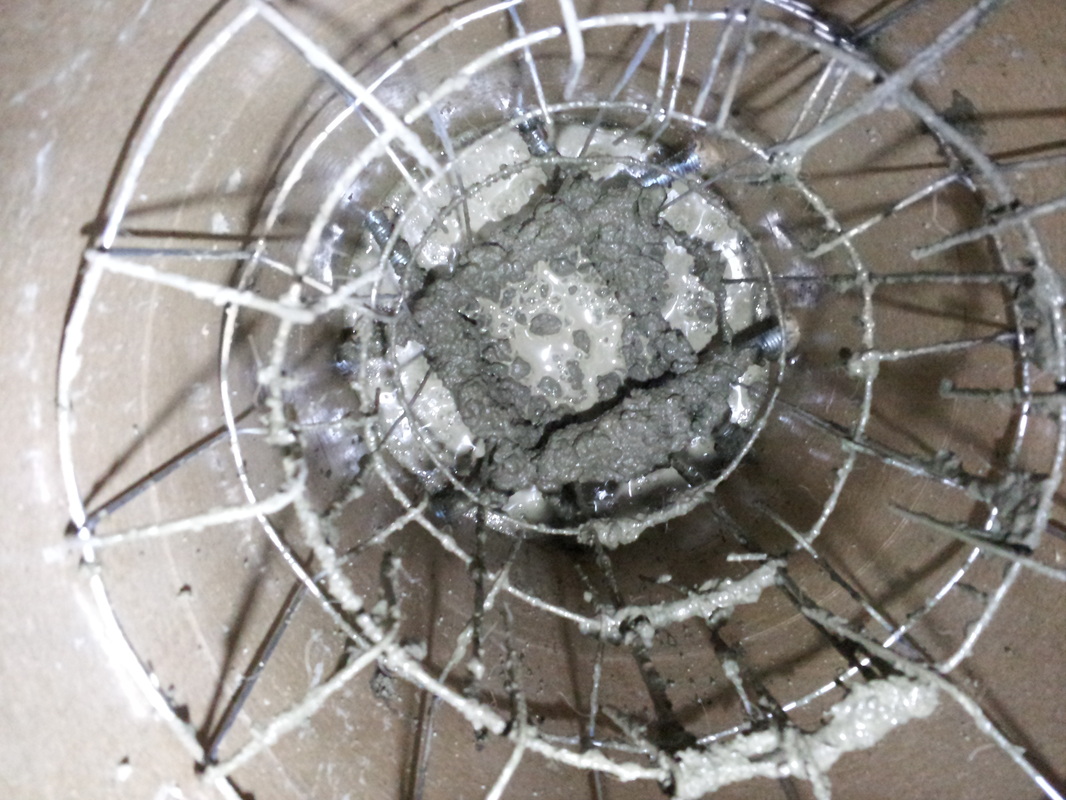
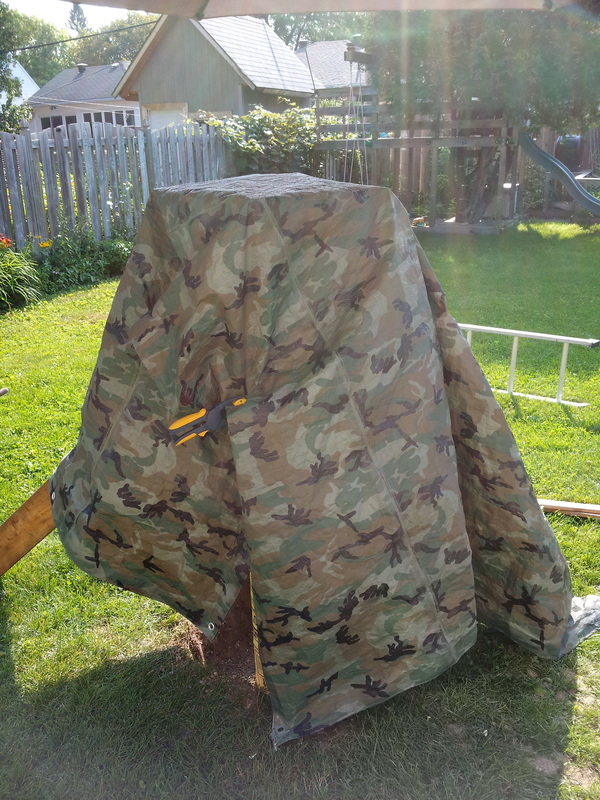
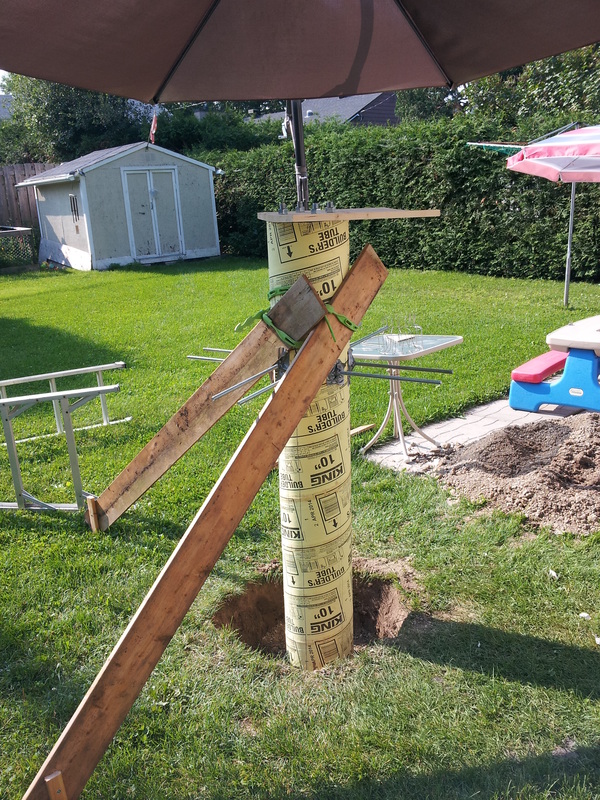
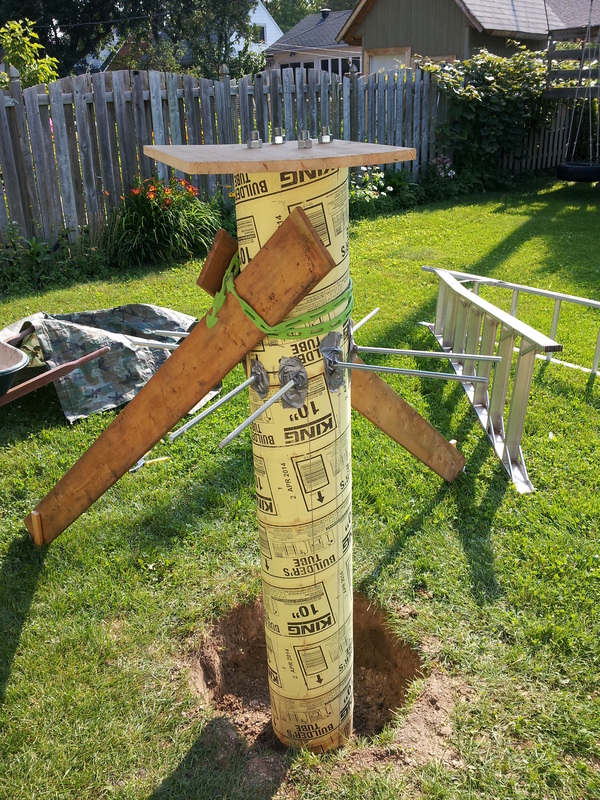
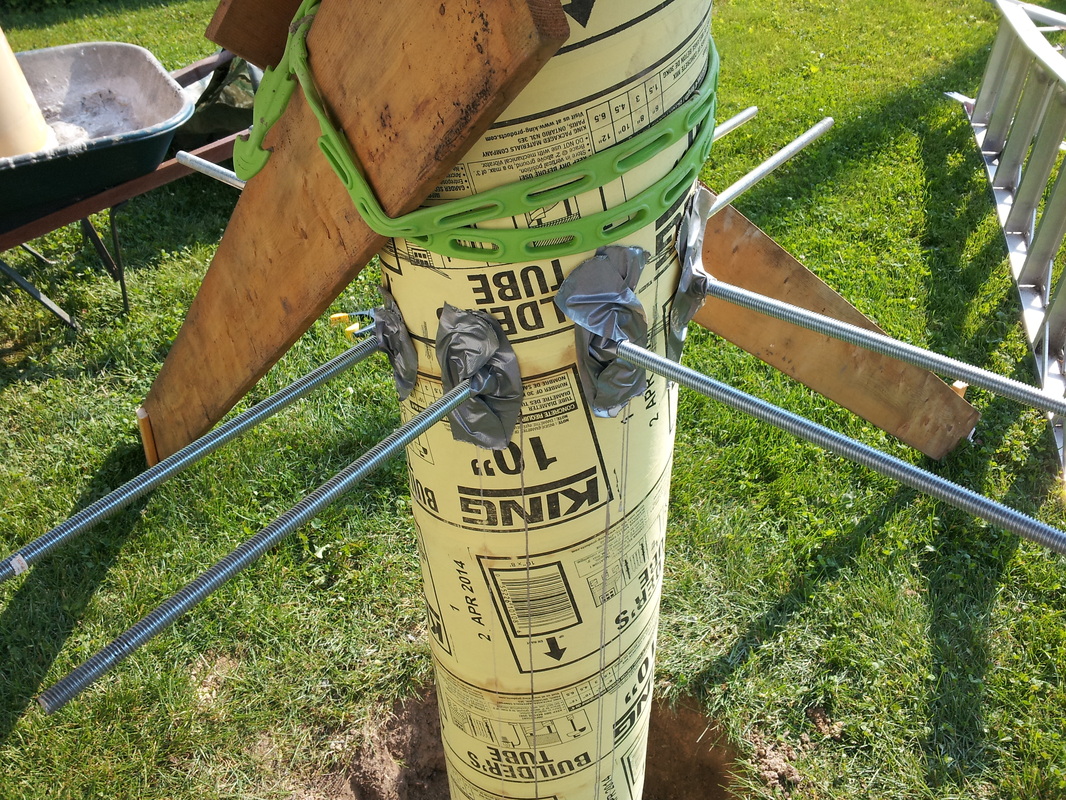
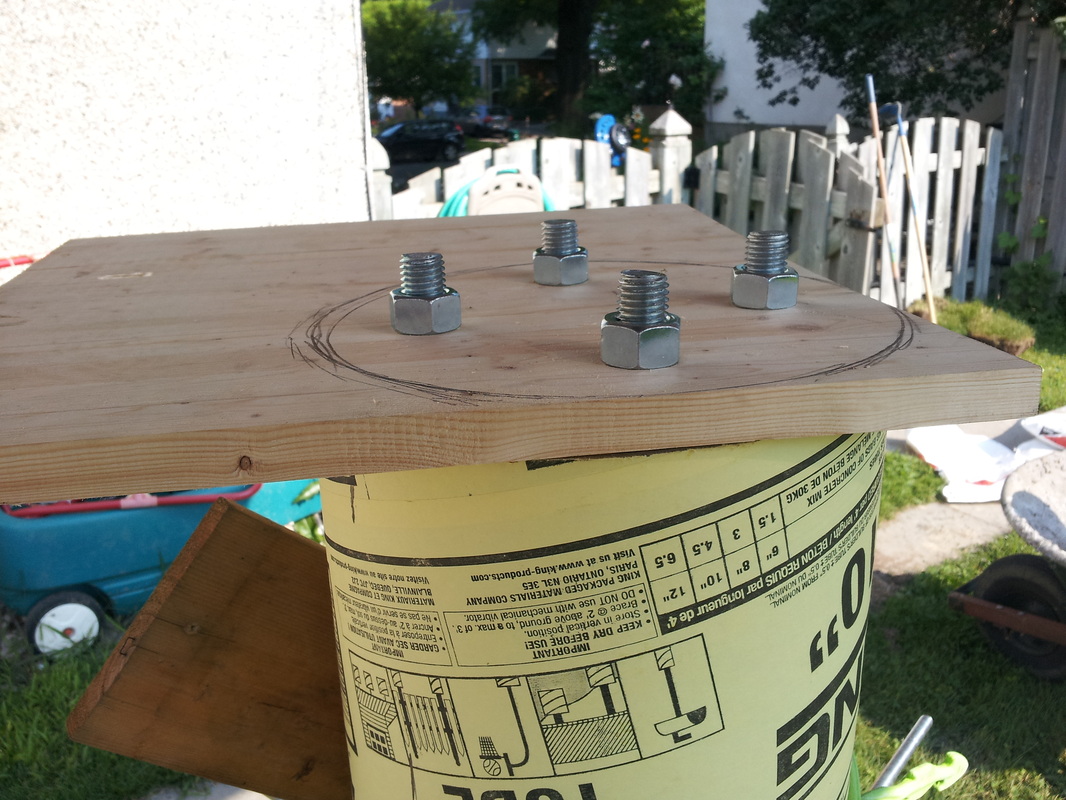
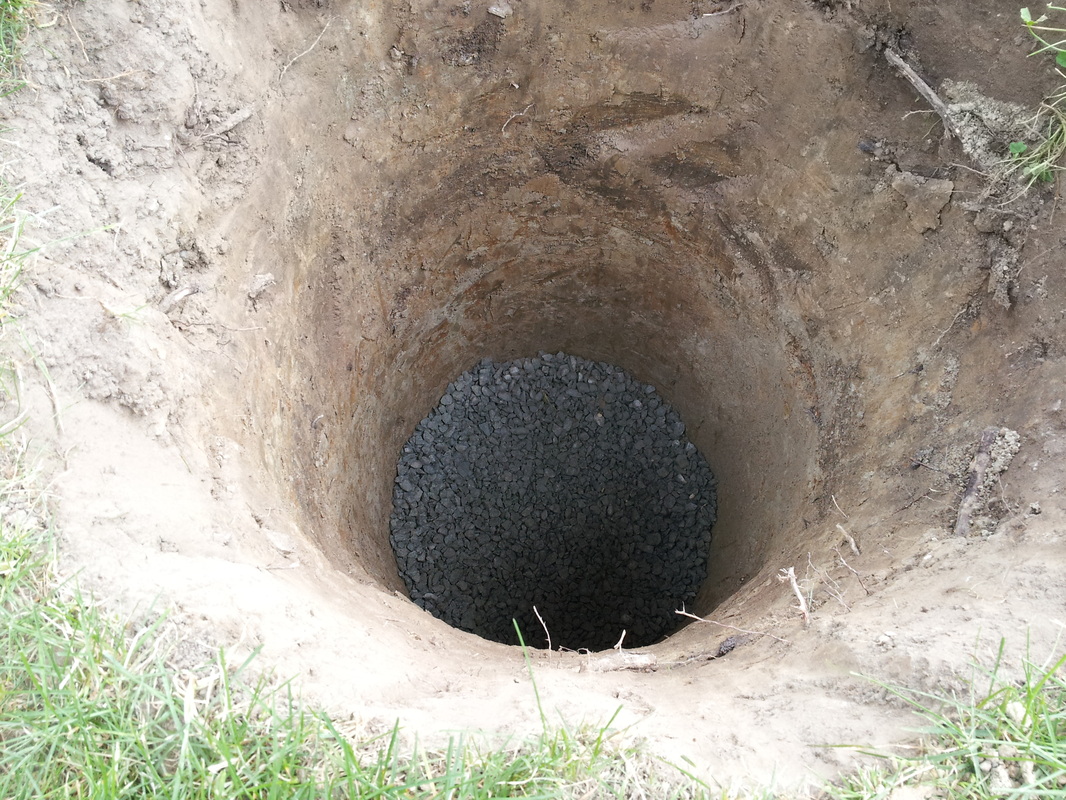
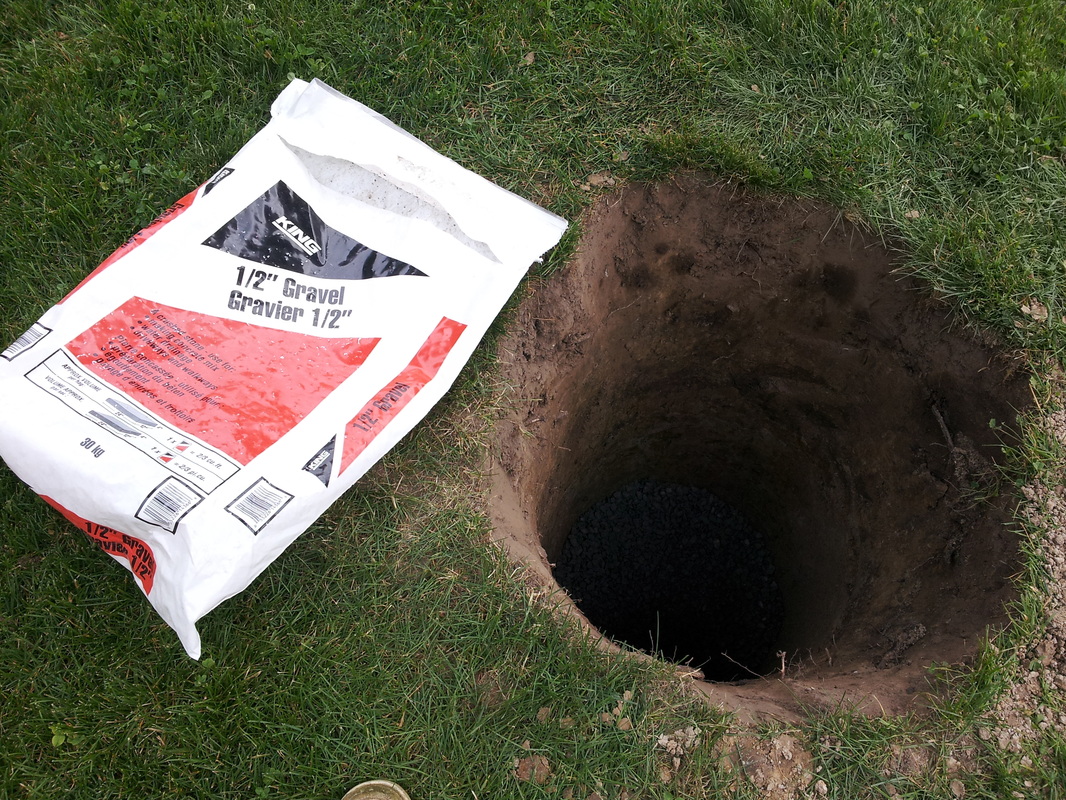
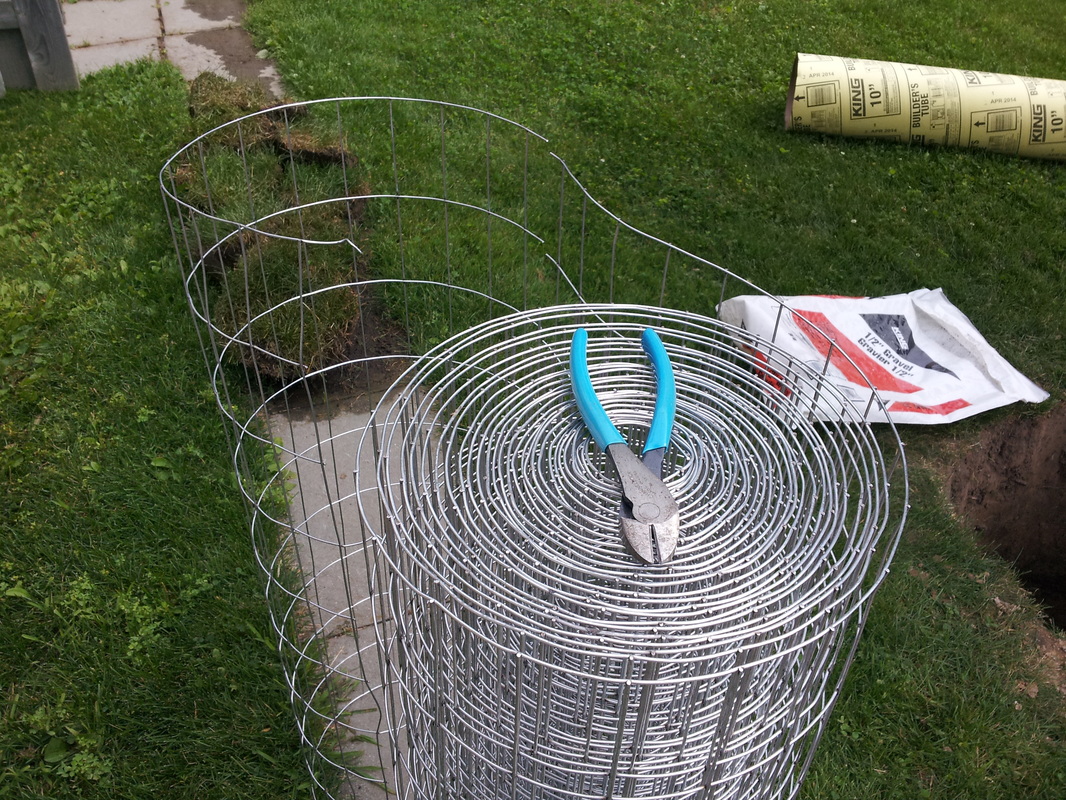
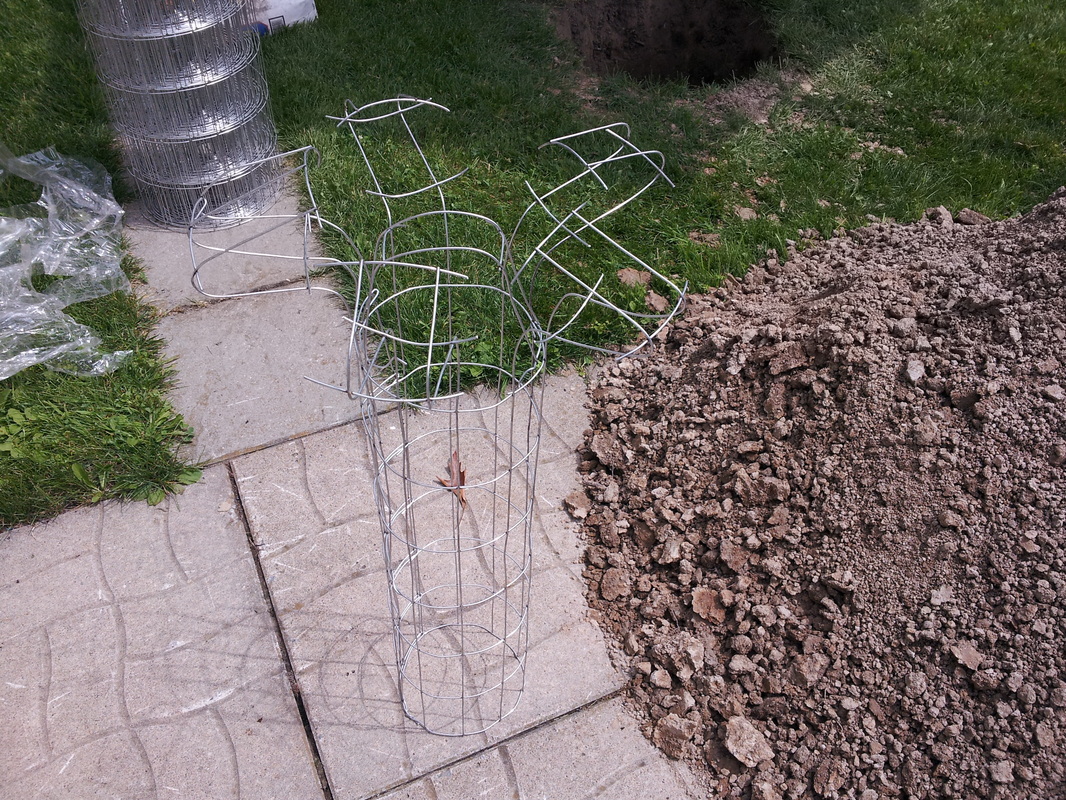
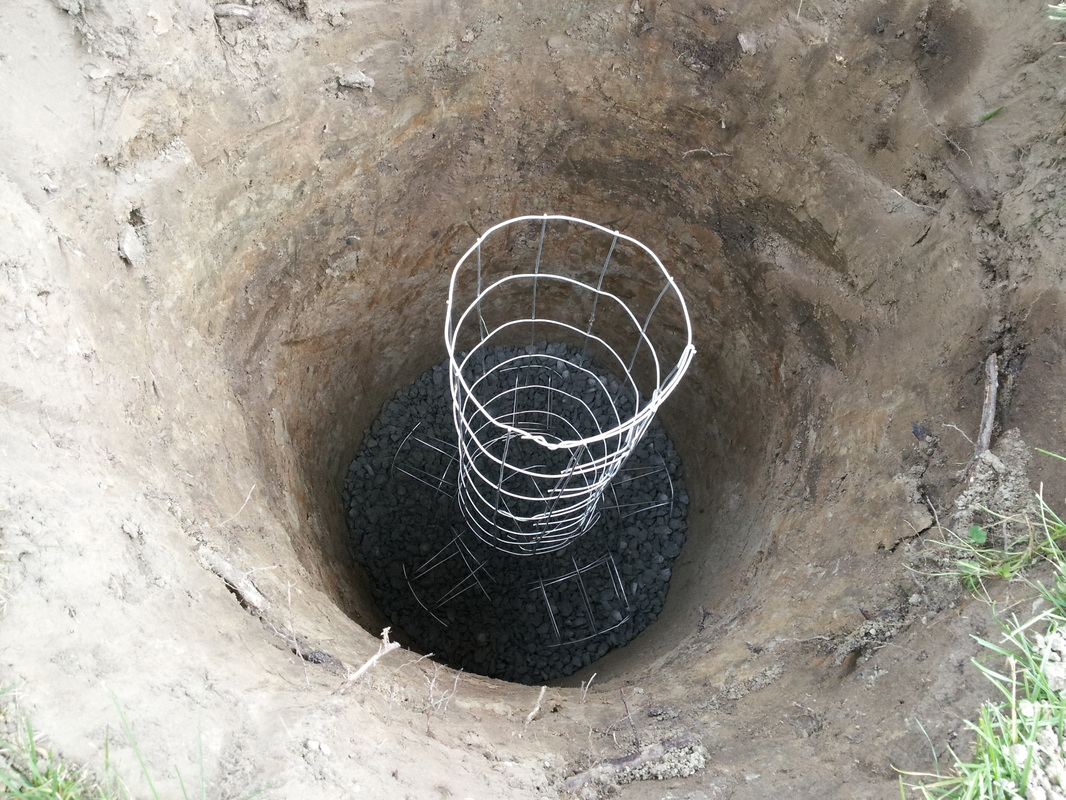
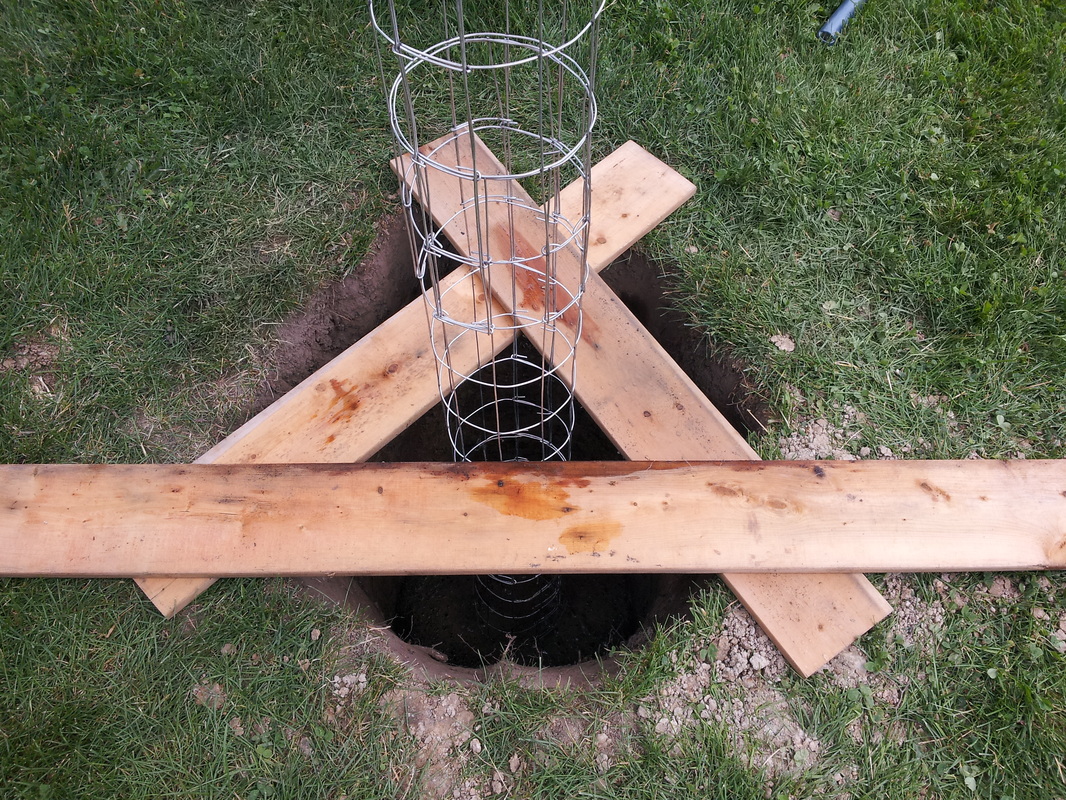
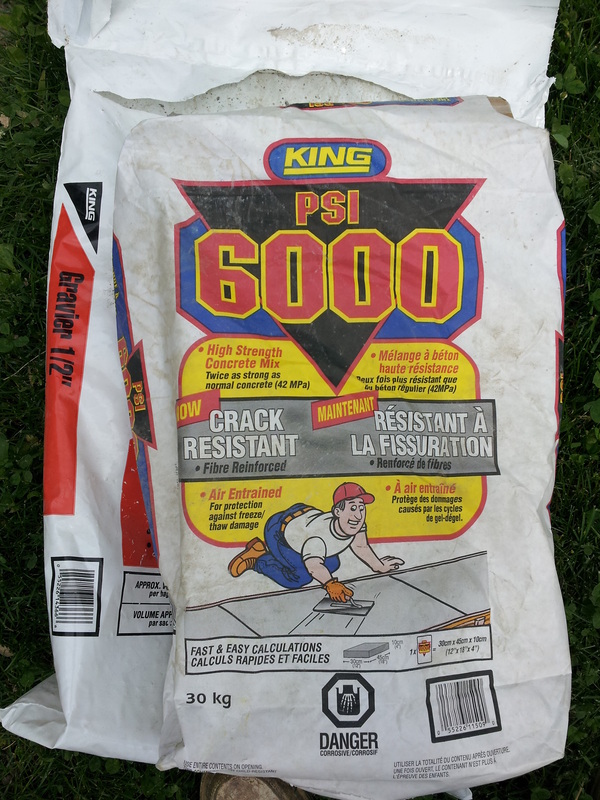
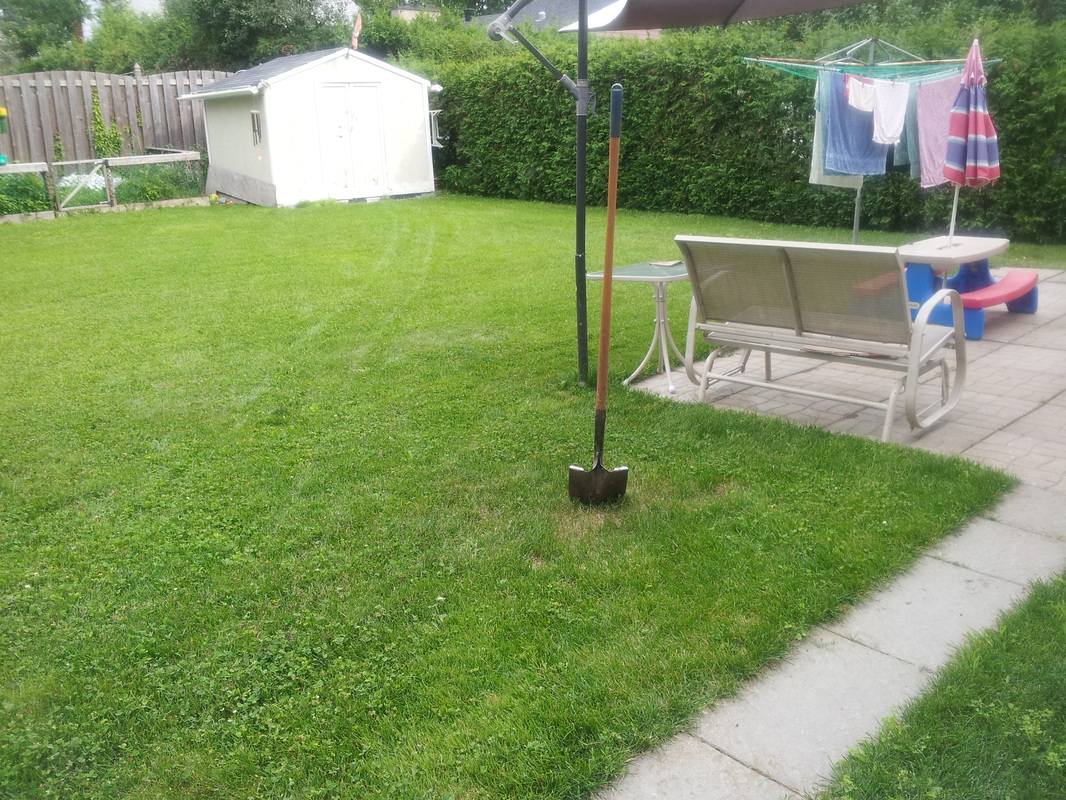
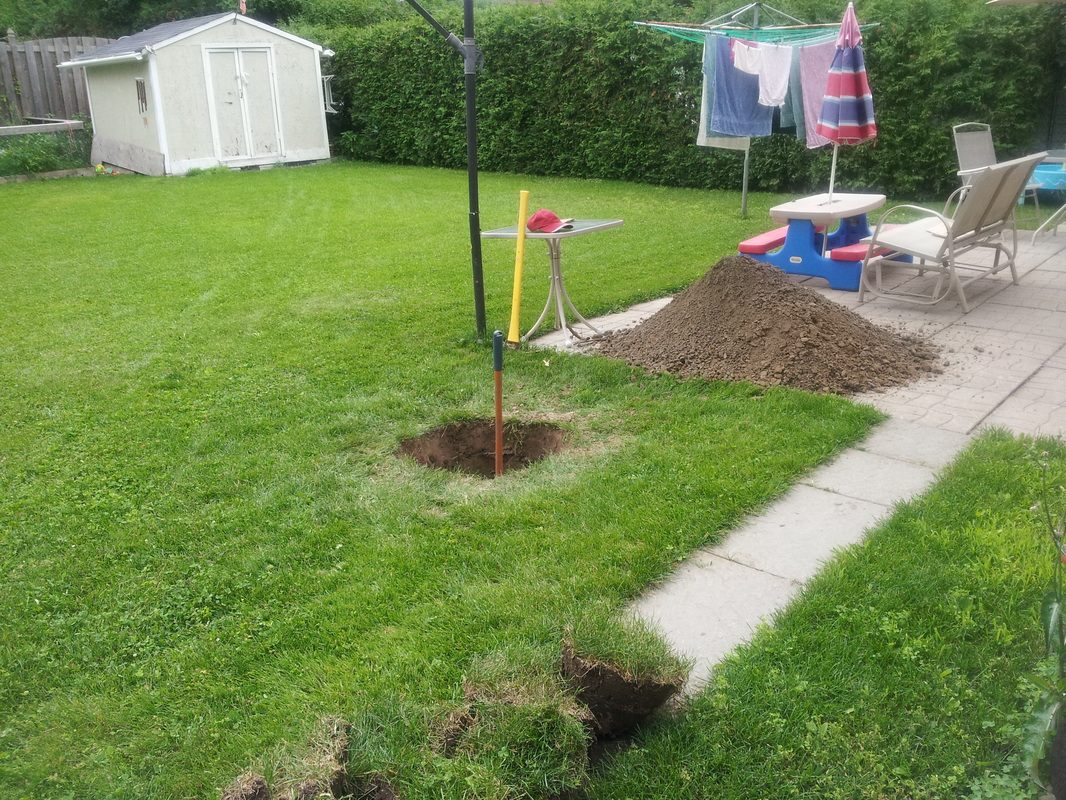
The pier is going to be exposed to the elements so I decided to give it a coat of paint to help protect it. I started by trimming off the sonotube flush with the top of the concrete. I then gave the whole thing a coat of primer followed by 3 coats of latex paint (picture below is after 2 coats). I'll let the kids paint some stars and planets on it later. This is where the pier will be left now for a while as I will be busy doing other things for the next couple weeks. The next steps will be to run 120VAC and my data cables underground and up the outside of the pier, and to build the wooden deck that will attach to the 1/2" threaded rods. Click on the images below to see a larger version. Pouring the rest of the concrete pier was a bit of a push. I thought it was important to do it all in one go so that the bond between layers was as strong as possible (I mixed and poured one 30kg bag at a time). That meant a long night for me as I wasn't able to get started until 7pm. Before I started I swung by Home Depot again to get the rest of the concrete I would need, 5 more bags for a total of 9 bags (including foundation). That came to another $40 plus tax. The process began by first making a quick little hat from a piece of the steel fencing that I put temporarily on the top of my cage. The hat was sized just slightly smaller than the sonotube ID, and its purpose was to keep the cage centered in the sonotube while I was pouring the concrete. With the hat in place I put the sonotube into position, and anchored the bottom with another 30kg bag of gravel evenly distributed and packed down. I then added wooden braces to the sonotube, confirming that it was plumb vertical. Now that the sonotube was secured I filled the rest of the hole around it back in using the dirt I dug out initially. I packed the dirt as I went, using a sledgehammer as a tamping tool. I made sure to double check the sonotube was still plumb along the way. With the sonotube now fairly secure I worked out the location of my 1/2" deck support rods, mount anchor bolt height, and concrete fill height, and marked it all on the exterior of the sonotube. I needed to trim 9" off the sonotube so that the mount anchor bolts would be at the correct height. I drilled holes and installed the 1/2" threaded rods, and pre-assembled the piece of plywood that would hold the four mount anchor bolts in the correct position when they were inserted into the concrete. Then began the ardous task of hand mixing up 8 bags of concrete, shoveling it into a bucket, shlepping it up a step ladder and pouring it into the sonotube. Once the sonotube was filled up to my preselected level I inserted the mount anchor bolts. I then covered the whole thing with a tarp and patio umbrella to keep it (relatively) cool while it cures. All this took about 4 hours to complete. In noted that at the end of all the pouring that the sonotube, despite all the bracing, was still quite wobbly. I think that due to the mass of wet concrete involved, you can not brace too much. This morning when I checked it, the pier was solid as a rock...sweet! Click on the pictures below to see a larger version. By foundation I am referring to the concrete base of the pier; the cap of an upside down mushroom if you will. I started by putting one 30kg bag of gravel into the hole, packing it down firmly. I then cut a section of steel fencing off the roll and formed it into a cylindrical cage of about 1/2 the diameter of the sonotube, so about 5". On the bottom I made a little mushroom shape so that the metal cage would stand up in the hole by itself plus add some reinforcement to the concrete foundation. I then mixed up one 30kg bag of concrete and poured it all into the hole. I had a while to wait while this pour set, so I rested some boards against the cage to give some support, then extended the cage upwards to just below the height of my pier, about 48" above ground level. I then covered the whole thing with a tarp and went to see Monty Python live via satellite with a buddy. Click on the images below to enlarge them. I had already selected where I want the pier a while ago. I have been setting my tripod up on this spot for the past year or so and it seems to be the best balance between view of sky and shelter from nearby porch lights. Digging was no fun. After the top 6" of topsoil the rest of the way down was solid clay (thanks for nothing Champlain Sea!) It took me about 2 hours of hand digging to get a hole roughly 24" across and 42" deep. I will be sore in the morning! Click on the images below to enlarge them. My main objective for this weekend is to get the concrete pier itself installed. It requires the most hard work to do. The first thing then was to get the supplies I needed. I chose Home Depot only because I know they have everything I need. I purchased the following:
Total bill for this list of items was $198 including tax. 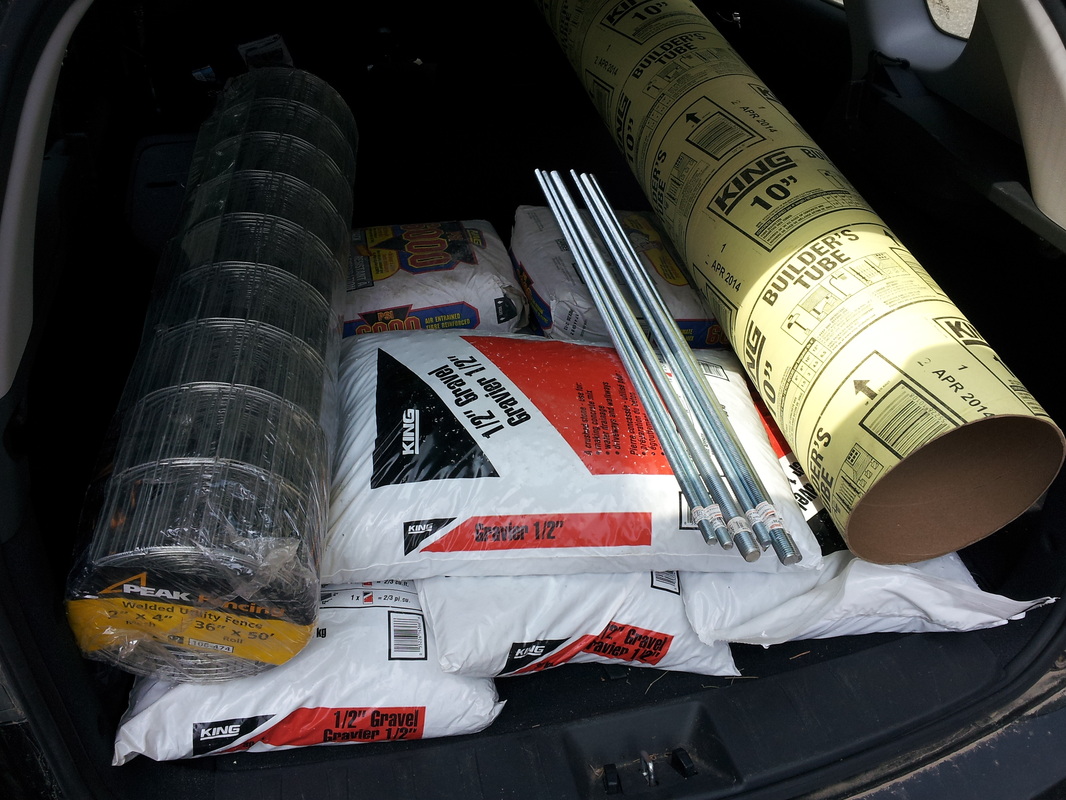 |
AuthorJim is an aerospace engineer living and working in Ottawa, Canada. He is also an amateur astronomer. Archives
November 2014
Categories |
|
ABBEY ROAD OBSERVATORY Telescope Pier Installation Blog |
|


 RSS Feed
